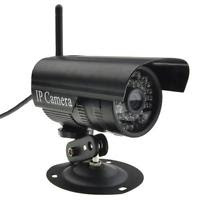
This post is the first part of a series which shows how to turn your IP-cam and raspberry pi (or other embedded linux machine. pc etc) into a pretty decent and *reliable* security system which logs images, auto archives old images and cleans up after itself.
It’s free, and all you need is a text editor and a bit of time to figure out the particulars for your system. I’ve done the hard bit which is working out the process and writing the bash scripts to actually do the hard work.

Background: (you can skip this bit if you just wanna know how to do it)
So a few years back we traded our old PAL front door cam for a funky new IP cam. The old setup was a bog-standard cctv cam off ebay and a very long old bnc network cable which ran through a VCR and into an ancient commodore 64 monitor. It was on at all times so we could always see whether it was postie bring us pressies off ebay or jehovas witnesses or other doorsteppers. It was reliable, no surprises. It didn’t crash once. It did however use a constant 60w of electricity (plus a bit for the VCR) 24/7/365 and I thought we could probably do better than that.

surprisingly super reliable!
So on to the IP cam….all good?…well, mostly, sort-of..not really.
If you’ve got an IP cam you’ll know they usually come with a web interface. In my experience these vary from a little sucky to downright terrible.
The one on our outdoor IP cam was ok for occasional use but normally I’d tend to keep a pinned browser tab open on my main machine with the IP cam on it so that when there was a knock on the door and I was still half asleep I could peek into my office and see who was at the door without having to worry about finding a bookmark. It was one of my “always open” tabs.
The problem was that the web interface for the IP cam would run for a while and then the javascript would get itself in a tizzy and fall over, leaving you with a still image which was obsolete or no image at all. This would happen after anything from 10 mins to a few hours, which made monitoring the front door interesting and exciting, but not reliable. Annoying.
So after putting up with it for a while and gradually getting more frustrated I started trying different approaches. First was an MK 809 III embedded pc running android, with the wanscam ipcam app on it. It was hooked up to a spare LCD monitor mounted on the wall above my main screens and was always on…so a quick glance into my office and I could see who was there.

surprisingly not very good.
We use the wanscam app on our phones and it’s very convenient but on the embedded android machine it also kept falling over, though it worked slightly better than the cam’s own web interface.
I think I tried a couple of other security style apps but they either didn’t work or were too complex or cost too much, or didn’t work on some platforms, situations or whatever.
Eventually I figured if i wanted something reliable which did exactly what I wanted (preferably for free) I’d have to make it myself. Enter a spare Raspberry pi and my text editor.
So after a bit of poking around and dismantling of the html source of the ipcam’s web interface it turns out it was actually pretty basic in terms of how it worked. My other IPcam seems to work the same way so I guess it’s quite a common approach.
It turns out that there’s a cgi url which you can pass the username and password to as well as a couple of other settings if needed, and when you call that url it basically returns whatever’s on the camera’s CCD at the time, delivered as a jpeg.
The web interface on the camera basically just had some javascript which pulled however many images a second off the CCD and displayed them in the browser in sequence, setting them to be the .src attribute of an image in the HTML interface…and hey presto, video feed (until it fails for whatever reason of course).
There was another issue with the web interface and the apps like the wanscam phone app. With our camera being outside with at least one brick wall and a tin shed mostly in the way, even with a high gain antenna the wifi signal wasn’t brilliant. It was ok but if you have 3 clients each pulling 30fps off it at once it would start to struggle, resulting in more lockups and failures.

Considering this is a security camera we don’t need anything like 30fps, but that’s the default setting of the web interface so you sorta keep ending up there.
So my solution works in two parts – the constant live feed, so you can see who’s at the door any time, and the monitoring/logging part which works independently in parallel but can be on the same machine if you want, or a different machine, as long as it’s able to access the camera.
The monitoring system:
Overview:
Ideally you’d need the following:
- an IP cam (duh)
- a spare LCD monitor (any size, age, type)
- a raspberry pi, similar linux mini pc or even a regular linux box. I’m using a raspberry pi running raspbian for the live feed and a linux box running ubuntu for the logging part, but you could easily run both on a rpi or probably even a pi zero at a push.
- an HDMI->VGA adapter if your LCD monitor is old like mine is and you’re using a RPI which only has HDMI out.
I like these ones. They’re compact and cheap
So, in the spirit of keeping things ultra simple but effective I wrote a little HTML page to do the job of the live feed. It just uses a couple of lines of javascript to pull the image off the IPcam’s CCD and display it full screen in the browser. It has a little green square in the corner which blinks momentarily when it’s trying to fetch a new frame.
It automatically recovers from connection errors and fixes itself so you really don’t need to touch it normally. The image just comes up the full size of the browser frame so and adapts to any size and aspect of screen – so you can use it on your pc, tablet, mobile or whatever. If it has a browser it should work.
On my raspberry pi monitoring system I don’t even have a keyboard or mouse attached normally and it runs for months on end without issue. Normally it only gets rebooted when I trip over a cable or unplug it accidentally. On boot up I’ve got it set to auto log in and you just need a mouse to launch Iceweasel (firefox) and set it full screen. The browser has it’s home page set to the CCTV monitoring page url so then you just need to tell it to go full screen.
Launching the browser could probably also be automated too but it gets rebooted so rarely that I never bothered figuring it out. If some clever-clogs wants to let me know how to do that you can email me.

functional and literally plug and play. no config needed
For the mouse I had a spare Lofree bluetooth keyboard/touchpad combo which is a bit vague for anything more involved but to click the browser icon on reboot it works just fine and it’s super plug and play, no config whatsoever.
The live/monitoring page has no server side php or whatever so you don’t really even need to host the page on a webserver if you don’t have one – you can just have the folder with the html file and a couple of images on your desktop and drag it into a tab and it’ll work just like that.
The logging system:
There was only the live feed till the other day when we discovered a dodgy looking gentleman round the side of the house poking around my car bits and shed. I don’t know what he was up to but I’m not generally a fan of having people rifling through my stuff uninvited.
Whilst having the live feed was useful, afterwards I was kicking myself because I’d not thought to take a photo of him on my phone and the live feed doesn’t save images, so as well as improving our physical security I wrote a couple of little bash scripts to enable logging in case he comes back.
The script runs every minute on a cron job and gets a pic off the ip cam every 5 sec, then saves it onto the linux machine as a jpg with a timestamp. Onc its minute is up it exits and restarts. Very simple.
Our camera is only 640×480 so the file sizes are pretty small but taking a pic every 5 sec it will produce about 750mb of jpgs a day over roughly 20,000 files. The default interval is 5 sec and it stores 7 days’ worth of archives so wiht the defaults should end up with a rolling ~5gb of data.
Obviously your available space will dictate your interval and how many days of archives you can store. I guess at a minimum you’d want to keep 2 days’ worth of archives. You can adjust both the snapshot interval and how many days’ archives to store in the scripts.
If something untoward occurs you can just go to the folder and scroll through the images to find the ones you need…e.g. the one with the person’s face as they get up to no good (as would have been useful in our case)…or that moment when your hamster does that adorable thing, stop-motion gardening…whatever.
20k images a day is still a lot of files though, especially if it doesn’t contain anythgin important. Having recently run out of inodes on one on my VPS boxes I learnt about inodes on linux machines. They’re like name tags for files and when you format a drive on linux you set how many inodes you want and then that’s how many you have. If you run out of inodes (name tags) it doesn’t matter if your drive isn’t actually full, that’s the end of your fun. Although by default you get a lot of inodes, needlessly storing gazillions of small jpgs is a surefire way to run out of inodes very soon so I made another script which runs on a cron job every day at 1am and finds all the files from the previous day and dumps them into a zipfile (using 1 inode instead of 20,000). It doesn’t really compress them much but makes them easier to handle.
Since eventually you’d also end up drowning in zipfiles there’s a third bash script which deletes zip archives older than 7 days. Again you can adjust this interval to suit your needs.
Getting started
First you’ll need the html file and the bash scripts which do the work.
Both the monitoring part and the logging part are together in the same folder.
Download The Scripts
Next part: hacking your camera.

